Category: Hardware

  • Protecting Your Hardware From Power Surges

    Protecting Your Hardware From Power Surges

    I remember the exact moment my philosophy shifted: it was a Tuesday night, mid-boss fight in a game I’d been meticulously studying for weeks, when the lights flickered and died. The sudden, heavy silence of my apartment was punctuated only by the cooling hum of my console dying mid-sequence. There is a specific, visceral frustration in losing progress not to a lack of skill, but to a failure of infrastructure. Most people treat backup power like an afterthought or a massive, expensive luxury meant only for survivalists, but I see it differently. To me, a reliable power solution isn’t just about keeping the lights on; it’s about protecting your momentum and ensuring that a sudden surge or outage doesn’t turn a productive session into a total loss.

    I’m not here to sell you on overhyped, industrial-grade battery arrays that cost more than a vintage arcade cabinet. Instead, I want to strip away the marketing fluff and look at this through a lens of intentionality and efficiency. I’m going to guide you through the practical, no-nonsense ways to secure your setup, focusing on gear that actually serves your lifestyle. My goal is to help you build a resilient environment where your focus remains on the game, not the grid.

    Table of Contents

    Calculating Battery Backup Runtime for Peak Efficiency
    Calculating Battery Backup Runtime for Peak Efficiency

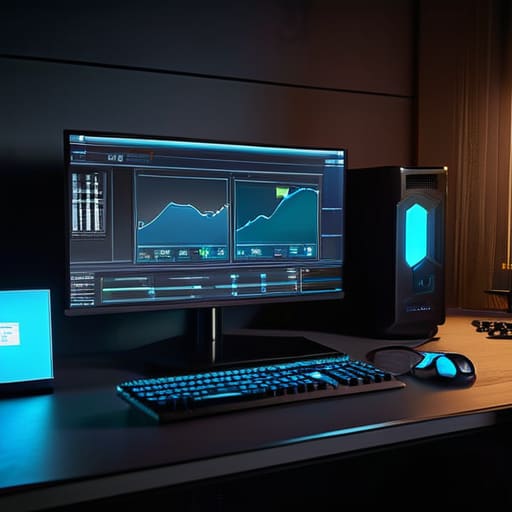
    Before you start shopping for gear, you need to treat this like a resource management puzzle in an RPG. You wouldn’t enter a boss fight without checking your mana pool, so don’t approach your setup without knowing your actual draw. To get an accurate battery backup runtime calculation, you first need to inventory your hardware. Don’t just guess; look at the wattage requirements for your rig, your monitors, and your router. If you’re running a high-end workstation, your consumption will be vastly different than if you’re just powering a handheld and a laptop.

    The math is straightforward once you have the numbers: divide the total capacity of your unit (usually measured in Watt-hours) by the total wattage of your connected devices. However, I always suggest adding a twenty percent buffer to account for inverter inefficiency. It’s better to have a surplus of energy than to find yourself staring at a black screen mid-raid because you miscalculated your load. Whether you are looking at an uninterruptible power supply for home office use or a larger setup, knowing your exact “drain rate” is the only way to play with intention.

    Emergency Power Outage Solutions for Proactive Players
    Emergency Power Outage Solutions for Proactive Players

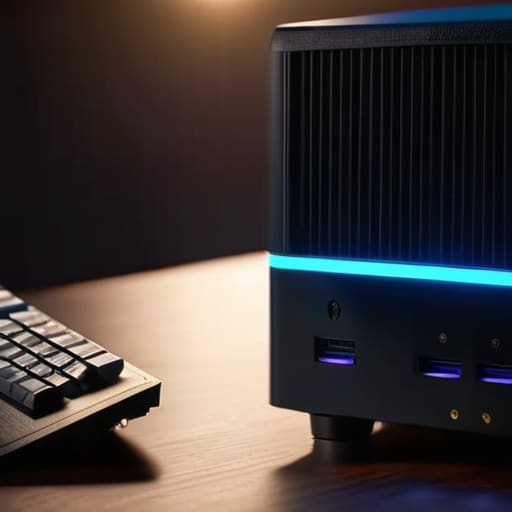
    When the lights flicker, most people just reach for a flashlight. But for those of us who treat our setups like precision instruments, a blackout is a systemic failure that needs a tactical response. You shouldn’t just be reacting to the dark; you should be prepared for it. I’ve learned that the best approach involves a tiered defense, starting with an uninterruptible power supply for home office setups. An Uninterruptible Power Supply (UPS) acts as your first line of defense, providing that critical bridge of seconds or minutes needed to save your progress and shut down safely, rather than letting a sudden drop in current corrupt your hardware.

    Beyond the immediate surge protection, you have to decide on your long-term survival strategy. This is where the debate of portable power stations vs generators really comes into play. If you’re looking for silent, indoor-friendly energy to keep a handheld or a laptop running through a long storm, a high-capacity power station is your best bet. Generators offer more raw muscle, but they lack the finesse required for delicate circuitry. For a proactive player, the goal isn’t just to stay powered—it’s to ensure your gear remains stable and protected from the chaotic fluctuations that follow a grid failure.

    Leveling Up Your Setup: 5 Tactical Moves for Power Resilience

    • Audit your gear’s power draw before you buy. Don’t just guess; check the wattage on your rig and peripherals so you aren’t left staring at a black screen ten minutes into a raid because you underestimated your consumption.
    • Invest in a high-quality Uninterruptible Power Supply (UPS). Think of it as your quick-save button; it provides those vital few minutes of bridge power to shut down safely or transition to a larger battery without corrupting your progress.
    • Prioritize modularity in your power station. If you’re building a serious backup kit, look for systems that allow you to swap batteries or expand capacity, much like upgrading a skill tree to meet increasing demands.
    • Test your failover systems under pressure. It’s easy to assume everything works until the lights actually flicker; run a dry rehearsal with your backup gear to ensure the transition is seamless and your hardware stays protected.
    • Mind your thermal management. Backup batteries and power stations generate heat, especially under heavy load. Keep your power solutions in a well-ventilated area to prevent efficiency drops or hardware throttling during a long session.

    The Strategic Advantage of Power Readiness

    Treat your power setup like a resource management mechanic; understanding your specific wattage needs prevents the “game over” of a sudden, unplanned shutdown.

    Don’t just react to outages—plan for them by building a tiered defense, from small portable power stations for handhelds to robust systems for full desktop rigs.

    True mastery comes from minimizing downtime, ensuring that when the grid fails, your focus remains on the play rather than the frustration of a lost session.

    The Strategy of Staying Powered

    “In a high-stakes session, a sudden power outage isn’t just an inconvenience; it’s a systemic failure that breaks your flow and ruins your momentum. Investing in reliable backup power is like mastering a complex mechanic—it’s the foundational layer that allows you to stop worrying about the environment and start focusing entirely on the game.”

    Delia Okonkwo

    Leveling Up Your Readiness
    Leveling Up Your Readiness with power stability.

    At the end of the day, managing your power setup is a lot like mastering a complex RPG mechanic: it requires preparation, precise calculation, and the right gear. We’ve looked at how to crunch the numbers for your battery runtime so you aren’t left staring at a black screen mid-boss fight, and we’ve explored the various hardware solutions that can keep your rig running when the grid fails. It isn’t just about buying the most expensive unit on the shelf; it’s about building a resilient ecosystem that matches your specific hardware needs and playstyle. By treating your power stability as a core component of your setup, you eliminate the anxiety of the unexpected and ensure your focus remains entirely on the game.

    I’ve spent many late nights hunched over vintage handhelds and modern rigs alike, and if there is one thing I’ve learned, it’s that the best sessions are the ones where nothing gets in your way. Gaming is an evolving journey, and as our technology becomes more sophisticated, our commitment to protecting that experience must grow too. Don’t view power redundancy as a chore or a technicality; view it as your ultimate insurance policy for uninterrupted immersion. Take the time to prepare now, so that when the lights flicker, you can simply keep playing. After all, the most important part of any great adventure is staying in the game.

    Frequently Asked Questions

    How do I balance the need for high-capacity power with the physical space requirements in my setup?

    It’s the classic trade-off: more capacity usually means more bulk, and nobody wants a massive, heavy unit eating up their desk real estate. I’ve found the sweet spot is prioritizing modularity. Instead of one giant monolith, look into high-density LiFePO4 power stations. They offer incredible energy density in a smaller footprint. Think of it like optimizing your inventory—you want the highest stats with the lowest weight penalty to keep your setup agile.

    Are there specific types of battery technologies, like LiFePO4, that are better suited for the heavy, consistent draw of a gaming rig?

    If you’re looking at long-term stability, LiFePO4 is the gold standard. Unlike standard lithium-ion, these cells handle the heavy, consistent draw of a high-end gaming rig without breaking a sweat or degrading prematurely. They offer much deeper discharge cycles, which is crucial when you’re pulling steady wattage for hours. It’s an investment in your setup’s longevity; it’s the difference between a temporary fix and a reliable, long-term power strategy.

    Can I integrate my existing smart home power management into a backup system without creating complex technical friction?

    You absolutely can, and honestly, you should. Integrating your smart home ecosystem isn’t just about convenience; it’s about building a cohesive system rather than a collection of isolated gadgets. Look for backup solutions that support open protocols like Matter or Zigbee. This allows your power management to “talk” to your lights and consoles seamlessly. If you choose gear that plays well with others, you avoid technical friction and gain much more intentional control.
  • Using Lighting to Enhance Your Gaming Atmosphere

    Using Lighting to Enhance Your Gaming Atmosphere

    I remember sitting in my childhood bedroom, squinting at a heavy CRT monitor while the only light came from a flickering desk lamp that made everything feel cramped and harsh. Fast forward to today, and I see people dumping hundreds of dollars into neon-soaked setups that look more like a chaotic nightclub than a space for focus. Most of the marketing around gaming lights is designed to trigger a dopamine hit through sheer visual noise, but if your setup is constantly strobing in your peripheral vision, you aren’t playing better—you’re just distracted.

    I’m not here to sell you on the latest overpriced RGB strip that promises to “transform your soul.” Instead, I want to help you use light as a tool for intentionality. My goal is to strip away the flashy hype and show you how to curate an environment that actually supports your cognitive flow. We are going to look at how to select lighting that reduces eye strain and enhances immersion, treating your workspace like the complex system it truly is. Let’s find the balance between aesthetic and utility.

    Table of Contents

    Building an Immersive Gaming Environment Through Light

    Building an Immersive Gaming Environment Through Light

    When we talk about an immersive gaming environment, we aren’t just talking about aesthetics or making a space look good for a webcam. We are talking about sensory cues that signal to your brain that it is time to transition from the mundane tasks of daily life into a state of deep focus. Lighting serves as that psychological threshold. By using subtle, indirect light, you can minimize the harsh contrast between your monitor and the darkness of your room, reducing eye strain and allowing your mind to settle into the rhythm of the game.

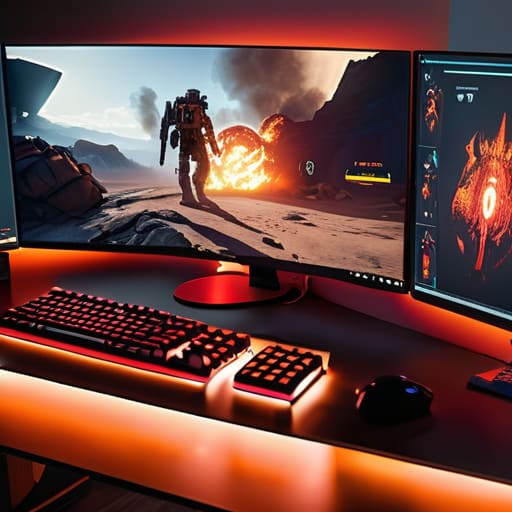
    To truly master this, you should look beyond basic strips and consider how to sync lighting with gameplay. There is a profound psychological shift that happens when a sudden explosion in a dark corridor is met with a soft, rhythmic pulse of amber or red from your desk setup illumination. It bridges the gap between the digital and the physical. Using smart LED controllers allows you to curate these moods, turning your space into a living extension of the world on your screen rather than just a room with a computer in it.

    Sync Lighting With Gameplay for Maximum Focus

    Sync Lighting With Gameplay for Maximum Focus

    If you want to move beyond mere aesthetic room decor for gamers and actually elevate your cognitive performance, you need to look at how light interacts with your sensory perception. When you sync lighting with gameplay, you aren’t just adding a flashy effect; you are creating a feedback loop that bridges the gap between the screen and your physical space. I’ve found that when my environment reacts to the on-screen action—shifting from a cool blue during a calm exploration phase to a sharp, pulsing red during a boss fight—my brain enters a state of heightened readiness. This isn’t about distraction; it’s about using visual cues to anchor your focus.

    To achieve this level of integration, I highly recommend investing in smart LED controllers that can interface directly with your hardware. Whether it’s through software integration or specialized hardware, the goal is to minimize the lag between the digital event and the physical response. A well-calibrated setup ensures that your desk setup illumination serves your intent, helping you maintain that elusive flow state. When the light in your peripheral vision matches the intensity of the game, the boundaries of the screen begin to dissolve.

    Precision in the Glow: Five Ways to Light Your Intentional Space

    • Prioritize indirect lighting over direct glare; you want the glow to wash against your walls, not hit your screen and break your concentration.
    • Use color temperature to signal your mental state, opting for warm, low-intensity hues when you’re winding down and cooler, sharper tones when it’s time to grind.
    • Match your light’s brightness to the ambient light in your room to prevent eye strain, treating your setup like a controlled ecosystem rather than a neon cave.
    • Keep your light placement symmetrical to help your brain process the visual field more efficiently, reducing the cognitive load during intense sessions.
    • Avoid “rainbow overkill” by selecting a cohesive color palette that supports your focus rather than distracting you with constant, frantic shifts in spectrum.

    Mastering Your Environment: Three Final Thoughts

    Lighting isn’t just about aesthetics; it’s a tool to reduce eye strain and help you maintain the mental clarity needed for long, intentional sessions.

    Use light to create boundaries. When the room dims and the glow shifts, your brain should recognize that it’s time to transition from the chaos of daily life into a state of deep focus.

    Avoid the trap of mindless, flashy setups. Choose lighting that serves your gameplay and your psychological well-being, rather than just following a trend.

    ## Beyond the Neon Glow

    “We often mistake flashy RGB for immersion, but true lighting design isn’t about how much color you can throw at a wall; it’s about using light to bridge the gap between your physical space and the digital system you’re trying to master.”

    Delia Okonkwo

    Beyond the Glow: Lighting with Purpose

    Beyond the Glow: Lighting with Purpose.

    At the end of the day, optimizing your space with gaming lights isn’t just about chasing a neon aesthetic or making your setup look good for a stream. It is about the psychological transition from the chaos of the real world into the structured, intentional space of the game. By carefully selecting your color temperatures and syncing your lighting to the rhythm of your gameplay, you are essentially priming your brain for deep focus. Whether you are using soft, ambient hues to reduce eye strain during a long session or sharp, reactive pulses to heighten your adrenaline, you are treating your environment as a tool for mastery rather than just a backdrop.

    As I sit here with my lukewarm tea, watching the soft glow of my monitors reflect off a vintage handheld, I’m reminded that how we curate our surroundings dictates how we experience our passions. Don’t just buy lights because they are trending; buy them to build an arena that respects your focus and enhances your skill. Gaming is a lifelong evolution, and as we grow, the way we engage with these digital worlds should become more thoughtful and refined. Set the stage, find your light, and play with intention.

    Frequently Asked Questions

    How do I choose between smart lighting systems that sync with my screen and simple, static RGB strips?

    It really comes down to how much mental bandwidth you want to dedicate to your setup. If you’re looking for a passive, reliable vibe that just stays consistent, go with the static RGB strips. They’re low-maintenance and won’t distract you. But, if you want to truly bridge the gap between the screen and your physical space, invest in the smart sync systems. They turn the environment into an extension of the game’s mechanics.

    Is there a point where too much colored light starts to interfere with my actual focus or causes eye strain during long sessions?

    Absolutely. There is a fine line between immersion and sensory overload. When your environment is a constant, flickering kaleidoscope of high-intensity RGB, your brain spends more energy processing the visual noise than the actual game mechanics. This leads to cognitive fatigue and significant eye strain. I’ve found that keeping colors steady and low-saturation helps maintain focus. Treat your lighting like a background score—it should support the experience, not drown it out.

    Can I integrate my lighting setup with my existing workspace to ensure a smooth transition between technical writing and gaming?

    Absolutely. In fact, I wouldn’t recommend against it. My desk is a constant battleground between technical documentation and deep-dive gaming sessions, so I’ve learned that versatility is key. Use smart bulbs or programmable LED strips that you can switch from a crisp, cool white for focus-heavy writing to a warmer, more immersive hue for gameplay. It’s about creating a single, cohesive ecosystem that signals to your brain exactly which mode you’re in.

  • The Rise of Handheld Gaming Computers

    The Rise of Handheld Gaming Computers

    I remember sitting on my bedroom floor in the late 80s, the tactile click of a plastic cartridge slot providing a rhythmic soundtrack to my afternoon. There was a specific, focused magic in those early handhelds—a sense of intentionality that seems to have vanished under the weight of modern marketing. Nowadays, when you look into the world of the handheld gaming pc, you aren’t met with that simplicity; instead, you’re bombarded by a chaotic landscape of teraflops, thermal throttling, and “must-have” specs that feel designed more to separate you from your paycheck than to enhance your play. It’s easy to get lost in the noise of what these devices could do, rather than what they actually do for your connection to a game.

    I’m not here to sell you on the hype or recite a spec sheet you could find on any retail site. My goal is to cut through the technical jargon and help you find a device that actually respects your time and your desire for mastery. I want to explore which of these machines truly offer a seamless bridge between your busy life and the deep, systemic engagement we all crave. We’re going to look at the reality of the experience, ensuring your next investment is a tool for intentional play, not just another expensive distraction.

    Table of Contents

    The Steam Deck vs Rog Ally Comparison Finding Your Edge

    The Steam Deck vs Rog Ally Comparison Finding Your Edge

    When you look at the steam deck vs ROG Ally comparison, you aren’t just comparing specs; you’re choosing a philosophy of play. The Steam Deck feels like a curated ecosystem. It’s designed with a focus on handheld PC ergonomics and controls that prioritize comfort during long, intentional sessions. It doesn’t always win on raw power, but its integration with SteamOS makes the transition from desktop to handheld feel seamless, almost intuitive.

    On the other hand, the ROG Ally is a brute-force machine. If your goal is pushing the limits of AAA gaming on portable devices, the Ally’s sheer integrated graphics performance is hard to ignore. It’s built for the player who refuses to compromise on frame rates, even if that means dealing with a more complex software layer. However, that power comes with a trade-off: you have to keep a close eye on gaming handheld thermal management to ensure the device doesn’t throttle right when you’re hitting a critical boss fight. Ultimately, the “better” device depends on whether you value a streamlined, tactile experience or raw, unbridled capability.

    Beyond Graphics Evaluating Integrated Graphics Performance

    Beyond Graphics Evaluating Integrated Graphics Performance

    When we talk about hardware, it is easy to get lost in the marketing buzz surrounding teraflops and clock speeds. But as someone who looks at games through the lens of cognitive load and system mastery, I care less about peak numbers and more about sustained stability. It isn’t enough to hit 60 FPS for thirty seconds; the real test is how that integrated graphics performance holds up during a grueling boss fight or a dense open-world trek. If the frame pacing is erratic, the player’s ability to enter a “flow state” is shattered, turning a moment of mastery into a frustrating exercise in twitchy compensation.

    This is where the conversation shifts from raw power to the reality of AAA gaming on portable devices. You have to consider how much heat that power generates. If a device is pushing high-fidelity textures but lacks sophisticated thermal management, you’ll eventually face thermal throttling. To me, a truly great device isn’t just the one with the highest theoretical ceiling, but the one that maintains a consistent, predictable rhythm of performance, allowing you to focus entirely on the mechanics of the game rather than the limitations of the silicon.

    Mastering the Machine: 5 Ways to Play with Intention

    • Prioritize Ergonomics Over Raw Specs: I’ve spent enough hours hunched over old consoles to know that a powerful chip means nothing if the chassis causes hand fatigue after twenty minutes. Before you buy, consider the weight distribution and button travel; you want a device that feels like an extension of your hands, not a heavy brick you’re fighting against.
    • Optimize Your Power-to-Performance Ratio: It’s tempting to crank every setting to “Ultra,” but that’s a recipe for a dead battery and a frustrated player. Learn to find the “sweet spot”—lowering shadows or textures slightly can often preserve your battery life and frame stability, allowing you to actually finish a session rather than constantly hunting for a charger.
    • Invest in a High-Quality MicroSD Card: Since these devices are essentially portable ecosystems, your storage is your lifeline. Don’t settle for the cheapest card you can find; a reliable, high-speed card ensures that your loading times don’t break the immersion or the flow of your gameplay.
    • Curate Your Library for the Format: A handheld isn’t a desktop replacement; it’s a specific way of interacting with games. Focus on titles that benefit from short, intense bursts of mastery or those that reward a more tactile, portable experience. Don’t try to force a 100-hour epic into a device if you only have thirty minutes of focused time.
    • Master the Software Ecosystem: Whether you’re using SteamOS or Windows, the software is just as important as the hardware. Spend time learning how to manage your TDP (Thermal Design Power) settings and custom profiles. True mastery of a handheld PC comes from knowing how to tune the system to match the specific demands of the game you’re playing.

    Mastering the Machine: My Final Thoughts

    Don’t get blinded by raw specs; choose a device that aligns with your specific playstyle and the complexity of the systems you want to master.

    Performance is a balance of power and efficiency—ensure your hardware can sustain the depth of your gameplay without becoming a frustrating technical bottleneck.

    View your handheld not as a mere toy, but as a dedicated tool for intentional gaming that fits into the actual rhythm of your life.

    The Philosophy of Portability

    “A handheld PC shouldn’t just be a way to squeeze in a few more minutes of play between errands; it should be a tool that allows you to engage with deep, complex systems with the same intentionality you’d bring to a desktop setup, no matter where you are.”

    Delia Okonkwo

    Finding Your Perfect Playstyle

    Finding Your Perfect Playstyle with handhelds.

    Choosing between the Steam Deck’s curated ecosystem and the raw, unbridled power of the ROG Ally isn’t just a technical decision; it’s a choice about how you want to interact with your library. We’ve looked at how the Steam Deck offers a seamless, almost console-like stability, while the Ally provides the performance headroom necessary for those who refuse to compromise on fidelity. It’s also clear that integrated graphics performance is the true heartbeat of these machines—it’s the bridge between a stuttering mess and a smooth, intentional experience. Don’t get blinded by flashy marketing specs; focus instead on the balance of ergonomics, battery life, and software stability that actually supports your ability to sit down and truly engage with a game.

    At the end of the day, a handheld PC is more than just a piece of hardware to be benchmarked; it is a tool for reclaiming your time and your passion. Whether you are tinkering with settings on a train or mastering a complex RPG in a quiet corner of your home, the goal remains the same: to move past mindless consumption and toward genuine mastery. Don’t just buy a device because it’s the newest thing on the market. Buy the one that respects your playstyle and allows you to immerse yourself in the systems you love. The game is waiting, and now, you have the means to meet it on your own terms.

    Frequently Asked Questions

    How much does battery life actually impact my ability to engage deeply with a game, rather than just playing in short, fragmented bursts?

    Battery life is the difference between immersion and interruption. When you’re constantly eyeing a percentage meter, you aren’t playing the game; you’re managing a resource. That anxiety prevents you from entering a true flow state. To master a system, you need time to observe patterns and refine your mechanics. If a device dies mid-session, you lose that cognitive momentum, leaving you with nothing but fragmented memories instead of genuine mastery.

    Given the complexity of these systems, how much technical troubleshooting should I expect to handle myself versus relying on plug-and-play ease?

    If you’re looking for a console-like experience, you’ll find it with the Ally, but don’t expect a seamless transition. With these handheld PCs, you are essentially managing a portable workstation. You should expect to handle minor driver updates, battery calibration, or tweaking TDP settings to get the performance you actually want. It’s not just “plug-and-play”; it’s “configure-and-play.” If you enjoy understanding the mechanics under the hood, it’s rewarding. If not, it’s a hurdle.

    Is the investment in a high-end handheld truly worth it for a player focused on mastering mechanics, or am I just paying a premium for visual fluff?

    It’s easy to get seduced by 4K textures, but if you’re playing to master mechanics, you aren’t paying for “fluff”—you’re paying for consistency. High-end hardware provides the frame rate stability and input latency reduction necessary for precision. When a frame drops during a boss fight, it isn’t just a visual hiccup; it’s a disruption of your cognitive flow. Invest in power to ensure the hardware never becomes the bottleneck to your skill.

  • Essential Hardware for Virtual Reality Gaming

    Essential Hardware for Virtual Reality Gaming

    I remember the first time I tried to get serious with a headset; I was surrounded by a mountain of glossy marketing brochures promising “total immersion” and “unparalleled fidelity.” It felt a lot like the hype cycles of the early 90s, all flash and very little substance. Most people will tell you that the most expensive vr hardware is the only way to achieve true presence, but as someone who spent years dissecting game loops and mechanics, I know that’s a lie. High specs mean nothing if the interface creates friction between your intention and the system’s response. You don’t need a bank loan to find depth; you need the right tools that respect your cognitive load.

    I’m not here to sell you on the latest shiny gimmick or help you chase specs just for the sake of a benchmark score. My goal is to strip away the marketing noise and look at these devices through a more analytical lens. I’ll help you evaluate vr hardware based on how it actually facilitates mastery and flow, ensuring your investment serves your skill rather than just cluttering your living room.

    Table of Contents

    Decoding Degrees of Freedom Tracking for Precision Play

    Decoding Degrees of Freedom Tracking for Precision Play.

    When we talk about precision, we aren’t just talking about how clear the image looks; we are talking about how the system understands your body in space. This is where degrees of freedom tracking becomes the backbone of your experience. If you’ve ever felt that nauseating disconnect where your head moves but the world lags behind, you’ve experienced a failure in how the hardware interprets your intent. For a serious player, understanding the difference between 3DoF—which only tracks rotational movement—and the much more sophisticated 6DoF is essential. Without those extra axes of movement, you aren’t truly inhabiting the digital space; you’re just a spectator trapped in a fixed position.

    To truly master a simulation, you need a system that treats your movements as meaningful inputs. This requires a seamless integration of sensors that minimize the gap between your physical action and the virtual reaction. When the tracking is precise, the cognitive load required to maintain your balance decreases, allowing you to focus entirely on the mechanics of the game. It turns a jittery, frustrating session into a fluid extension of your own agency.

    The Optical Edge Fresnel vs Pancake Lenses Explained

    The Optical Edge Fresnel vs Pancake Lenses Explained

    If you’ve ever spent an hour in a headset only to walk away with a dull headache, you’ve likely felt the direct impact of lens design on your vestibular system. For years, Fresnel lenses were the industry standard; they are lightweight and cost-effective, but they come with a trade-off. Because of their concentric ridges, you often deal with a “sweet spot” problem—if your eyes aren’t perfectly aligned, the image blurs. This can be a significant hurdle for motion sickness prevention hardware, as any visual distortion can break the illusion and trigger nausea.

    On the other hand, we are seeing a massive shift toward pancake lenses in newer, high-end kits. By folding the light path, these lenses allow for a much slimmer profile and, more importantly, edge-to-edge clarity. When we talk about fresnel vs pancake lenses, we are really talking about the difference between fighting your hardware and working with it. Pancake lenses minimize the “god rays” and blurriness that plague older tech, allowing you to focus entirely on the mechanics of the game rather than struggling to keep the image in focus.

    Beyond the Specs: My Practical Checklist for Intentional VR Setup

    • Prioritize tracking reliability over flashy features. If the sensors can’t keep up with your physical movements, you’ll spend more time fighting the hardware than mastering the game’s mechanics.
    • Don’t ignore the ergonomics of the strap. A headset might have the best resolution in the world, but if the weight distribution causes neck strain after twenty minutes, your ability to focus on deep play is gone.
    • Test the refresh rate against your own sensory threshold. High-fidelity visuals mean nothing if the latency or low refresh rates trigger motion sickness; you need a seamless loop to achieve true presence.
    • Invest in a high-quality audio solution that complements the spatial tracking. Sound is a massive part of the systemic feedback in VR, and built-in speakers often fail to provide the directional cues necessary for total immersion.
    • Check your physical environment’s scale before committing to a setup. Ensure your play space allows for the degrees of freedom you’re paying for, otherwise, you’re just buying expensive constraints.

    Essential Principles for Your VR Investment

    Prioritize tracking precision over flashy specs; if your degrees of freedom are inconsistent, you’ll never achieve the muscle memory required for true mastery.

    Choose your optics based on your playstyle, understanding that pancake lenses offer clarity for deep immersion while Fresnel lenses might suit a different budget-conscious approach to the system.

    View your hardware as an extension of your intent, selecting tools that reduce friction between your brain and the game’s mechanics rather than just chasing the latest marketing buzzwords.

    The Interface of Intention

    “We shouldn’t view VR hardware as just a way to see a digital world, but as the precision instrument that dictates how deeply we can actually interface with its underlying systems.”

    Delia Okonkwo

    Selecting Your Portal

    Selecting Your Portal for VR mastery.

    At the end of the day, choosing your VR setup isn’t about chasing the highest spec sheet or the most expensive marketing buzzwords. It’s about understanding how the technical nuances—from the precision of your tracking to the clarity of your lenses—directly impact your ability to interface with the digital world. If the hardware creates friction, you’ll never truly master the systems within the game. Whether you prioritize the lightweight comfort of pancake lenses or the robust freedom of high-fidelity tracking, ensure your gear serves your specific way of playing. Don’t let a hardware limitation become a barrier to your intentional mastery.

    I remember the first time I felt truly immersed in a digital space, and it wasn’t because of the graphics; it was because the tools felt like an extension of my own intent. VR is still a frontier, a complex system that evolves alongside us, and your hardware is simply the bridge between your mind and the simulation. Don’t just play to pass the time; choose the tools that allow you to deepen your connection to the experience. Pick the gear that lets you stop thinking about the headset and start thinking about the game. That is where the real skill begins.

    Frequently Asked Questions

    How much does my PC's processing power actually limit the immersion of a standalone headset?

    Think of your standalone headset as a self-contained ecosystem. While it handles the heavy lifting internally, your PC acts as the external brain when you’re tethered via Link or Air Link. If your PC can’t keep up with the stream, you’ll hit frame drops and latency. That’s where the illusion breaks. To maintain true immersion, your hardware needs to feed the headset enough data to ensure every movement feels fluid and intentional, not stuttery.

    Is the increased weight of high-end headsets worth the trade-off in visual clarity for long sessions?

    It’s a classic trade-off: visual fidelity versus physical endurance. From a psychological standpoint, cognitive load increases when you’re fighting discomfort. If a headset is too heavy, your brain spends more energy managing physical strain than mastering game mechanics. For short, intense sessions, go for the clarity. But if you’re planning to lose yourself in a complex system for hours, prioritize ergonomics. I’d rather have a slightly softer image than a neck ache that breaks my flow.

    When should I prioritize wireless freedom over the raw performance of a tethered connection?

    It really comes down to the type of mastery you’re chasing. If you’re diving into a high-fidelity sim where every frame counts toward your muscle memory, that tethered connection is non-negotiable. But if your goal is spatial awareness and uninhibited movement—think intense rhythm games or room-scale exploration—the cable is just a trip hazard waiting to break your flow. Prioritize wireless when the freedom to move without mental friction outweighs the need for raw graphical fidelity.

  • Customizing Your Mechanical Keyboard Experience

    Customizing Your Mechanical Keyboard Experience

    I remember sitting in my dim home office last Tuesday, nursing a cup of lukewarm Earl Grey, staring at a high-end peripheral that cost more than my first car. The marketing promised “transcendental input,” but all I felt was a disconnect between my intent and the machine’s response. There is a pervasive, expensive myth in the gaming community that you need a thousand-dollar setup to achieve mastery, when in reality, the nuance lies in the mechanics, not the price tag. When we talk about btm keyboards, the industry loves to drown the actual utility in a sea of RGB lighting and hollow hype, making it harder than it needs to be to find a tool that actually serves your playstyle.

    I’m not here to sell you on the latest overpriced trend or feed you a list of spec sheets you can find anywhere else. My goal is to strip away the fluff and look at btm keyboards through the lens of intentional play and mechanical precision. I’ll be sharing my direct, experience-based breakdown of what actually matters—from tactile feedback to latency—so you can stop mindless consuming and start investing in your skill.

    Table of Contents

    The Mechanical Keyboard Enthusiast Guide to Precision

    The Mechanical Keyboard Enthusiast Guide to Precision

    If you’re looking to move beyond off-the-shelf peripherals, you have to start thinking like a builder rather than just a consumer. A true mechanical keyboard enthusiast guide isn’t just about picking the prettiest lights; it’s about understanding how every physical interaction influences your reaction time. When I’m deep in a session, I need my inputs to be predictable and crisp. This often comes down to the fundamental choice between linear vs tactile switches. Linears offer that smooth, uninterrupted travel that feels seamless during high-intensity movement, whereas tactiles provide a physical bump that can help you feel exactly when a command has been registered.

    Beyond the switches, the soul of your setup lies in the fine details. I’ve spent many late nights lubing mechanical switches to eliminate that distracting scratchiness, ensuring every press is as fluid as possible. You also can’t overlook how different keyboard mounting styles affect the overall vibration and “feel” of the board under your fingertips. It’s these subtle, mechanical nuances that transform a piece of plastic into a precision instrument, allowing you to play with the level of intention I always talk about.

    Choosing Linear vs Tactile Switches for Skillful Mastery

    Choosing Linear vs Tactile Switches for Skillful Mastery

    When you’re deep in a session, the physical feedback from your switches dictates how much “intent” actually makes it from your brain to the screen. This is where the debate of linear vs tactile switches becomes more than just a technicality; it’s about how you perceive your own agency within the game. If you are playing a high-speed rhythm game or a twitch-heavy shooter, linear switches offer a smooth, uninterrupted path that feels almost frictionless. There’s no bump to fight against, which allows for those lightning-fast, repetitive inputs that are crucial when every millisecond counts.

    On the other hand, if your playstyle leans toward strategy or games where precision placement is more important than raw speed, tactile switches might be your best friend. That subtle physical bump provides a sensory confirmation that the keypress has actually registered, preventing those frustrating accidental double-taps. For those of us who treat our setup as a craft, I often find that experimenting with custom keyboard build components—like trying different spring weights or even lubing mechanical switches—can bridge the gap between a generic feel and a truly personalized, masterful experience.

    Tuning Your Setup: 5 Ways to Integrate BTM Keyboards into Intentional Play

    • Prioritize latency over aesthetics. When you’re working on your reaction time, a BTM keyboard’s polling rate matters far more than how much RGB lighting it throws at your desk.
    • Match your switch profile to your cognitive load. If you find yourself playing high-intensity matches after a long day of technical writing, choosing a switch that offers consistent, predictable feedback can reduce the mental fatigue of micro-adjustments.
    • Don’t ignore the importance of keycap texture. It sounds trivial, but the tactile grip on your fingertips directly impacts your ability to execute precise inputs without your hands slipping during a crucial moment.
    • Practice with intention, not just repetition. Once you have your BTM setup, don’t just grind levels; use the increased precision to isolate specific mechanics, like frame-perfect inputs, to see exactly how much more control the hardware provides.
    • Maintain your hardware to preserve your muscle memory. A single sticking key can break your flow and ruin the precision you’ve worked so hard to build. Keep those switches clean and your firmware updated.

    Making the Connection: Tools for Intentional Play

    A BTM keyboard isn’t a luxury; it’s a way to bridge the gap between your mental intent and your in-game execution.

    Don’t just chase specs—choose a switch profile that matches your specific mechanical rhythm and cognitive load.

    Mastery requires the right feedback loop, so invest in hardware that tells your brain exactly when an input has been registered.

    The Psychology of the Input

    “When we talk about BTM keyboards, we aren’t just discussing hardware specs; we’re discussing the bridge between intention and execution. A keyboard that responds with precision allows your brain to stop fighting the interface and start focusing entirely on the system of the game itself.”

    Delia Okonkwo

    Beyond the Hardware

    Mechanical synergy beyond the hardware.

    At the end of the day, selecting a BTM keyboard is about more than just chasing the latest spec sheet or aesthetic trends. It’s a decision rooted in how you want to interface with your digital world. Whether you’ve leaned toward the smooth, uninterrupted glide of linear switches for rapid-fire inputs or the deliberate, satisfying bump of a tactile switch to prevent accidental keystrokes, you are essentially calibrating your nervous system to the game. By understanding the relationship between your physical touch and the on-screen response, you move away from fighting your equipment and toward a state of true mechanical synergy.

    As I sit here with my tea, watching the light catch the worn edges of my vintage handhelds, I’m reminded that tools evolve, but our desire for mastery remains constant. A high-performance keyboard isn’t a magic pill that will instantly grant you pro-level reflexes, but it is a vital foundation for intentional play. Don’t just buy gear to keep up with the crowd; invest in the tools that allow you to express your unique style and precision. Remember, the goal isn’t just to play faster—it’s to play with purpose and find the profound joy that comes from total control.
    Frequently Asked Questions

    How much of a difference does BTM technology actually make for my reaction time compared to a standard mechanical switch?

    It’s not just about a few milliseconds, though that matters in high-stakes play. The real difference lies in the reduction of input latency and the consistency of the actuation point. With standard switches, you’re often fighting against physical travel distance. BTM technology tightens that feedback loop, allowing your brain’s intent to translate into on-screen action almost instantly. It turns a reactive struggle into a fluid, intentional extension of your own reflexes.

    If I'm transitioning from a membrane keyboard, will the learning curve for BTM precision feel intuitive or frustrating?

    Honestly? It’s going to feel a bit jarring at first. Coming from a membrane keyboard, you’re used to a “mushy” bottom-out that masks your mistakes. With BTM precision, the feedback is immediate and unapologetic. You might find yourself overshooting keys or feeling like you’re “stabbing” at them. Don’t let that frustration derail you, though. It isn’t a flaw in your skill; it’s just your muscle memory recalibrating to a more honest tool.

    Are there specific games where the rapid actuation of a BTM keyboard provides a genuine competitive advantage, or is it mostly overkill?

    It really depends on the genre, but for rhythm games or high-speed fighting games, that rapid actuation is a game-changer. In titles like osu! or Street Fighter, where milliseconds dictate the difference between a perfect combo and a missed input, it’s far from overkill. It’s about reducing the gap between your brain’s intent and the game’s response. If your playstyle relies on frame-perfect precision, the hardware isn’t just a luxury—it’s a functional necessity.

  • The State of Wireless Gaming Technology

    The State of Wireless Gaming Technology

    I remember sitting on my bedroom floor in the late 90s, surrounded by a chaotic web of grey Ethernet cables and tangled power cords just to get a single console online. Back then, connectivity felt like a physical struggle, something you could touch and troubleshoot with a screwdriver. Today, we’ve traded that tactile reality for the invisible magic of wireless technology, but I’ve noticed a frustrating trend: we’ve become passive consumers of it. We treat a dropped signal or a spike in latency like an act of god rather than a breakdown in a complex system we should actually understand.

    I’m not here to sell you on the latest shiny gadget or drown you in marketing jargon about “seamless integration.” Instead, I want to pull back the curtain on how these invisible signals actually function within your ecosystem. My goal is to help you move past the frustration of “it just works” and toward a place where you can intentionally manage your connection. We are going to look at the mechanics of the airwaves so you can stop fighting your hardware and start mastering your environment.

    Table of Contents

    Decoding the Complexities of the Radio Frequency Spectrum

    Decoding the Complexities of the Radio Frequency Spectrum.

    To understand how our devices actually “talk,” you have to look past the sleek hardware and focus on the invisible landscape they inhabit: the radio frequency spectrum. I like to think of this spectrum as the ultimate multiplayer map. Just like in a high-stakes strategy game, space is limited, and everyone is fighting for bandwidth. If too many players try to occupy the same coordinate at once, you get lag, dropped packets, and total chaos.

    Navigating this isn’t just about having the newest gadget; it’s about understanding the underlying wireless communication protocols that dictate how data moves through the air. When your connection stutters during a crucial moment, you aren’t just experiencing a glitch; you’re likely witnessing the fallout of congestion or poor signal management. Mastering the nuances of how different frequencies interact—and how to manage the inevitable noise—is the difference between a seamless experience and a frustrating technical bottleneck. It requires a level of intentionality that most casual users completely overlook.

    Navigating Bluetooth Connectivity Standards With Intention.

    When we talk about Bluetooth, most people view it as a simple “plug and play” convenience. But if you look closer, through the lens of someone who appreciates complex systems, it’s actually a delicate dance of wireless communication protocols. Whether you’re syncing a controller to a handheld or streaming audio, you aren’t just connecting devices; you are navigating a specific set of rules designed to manage data flow without crashing the whole system.

    The real challenge arises when your environment becomes crowded. I’ve noticed that my connection stability often dips when my router is working overtime, proving that wifi signal strength and Bluetooth aren’t just operating in vacuums—they are constantly negotiating for space. To play with intention, you have to understand that these devices are essentially competing for airtime.

    Mastering these bluetooth connectivity standards means more than just pairing a device; it’s about recognizing how environmental noise affects your experience. Once you understand how to minimize interference, you stop fighting your hardware and start actually commanding your setup.

    Optimizing Your Signal: Five Strategies for Intentional Connectivity

    • Treat your router placement like a high-level strategy guide; don’t hide it in a cabinet or behind a heavy desk. Physical obstructions are the “environmental hazards” of the wireless world, and a clear line of sight is often the difference between a smooth experience and constant lag.
    • Audit your device density to prevent signal congestion. Just as too many NPCs can tank a game’s frame rate, having twenty different smart devices fighting for the same frequency band creates a bottleneck that no amount of high-speed internet can fix.
    • Prioritize the 5GHz band for tasks that require precision and low latency. If you’re doing something that demands immediate feedback—like competitive gaming or high-bitrate streaming—think of 5GHz as your specialized skill build: it has less range, but it offers the high-performance output you need.
    • Manage your interference by being mindful of “non-gaming” electronics. Microwaves, baby monitors, and even some poorly shielded power cables can act like debuffs to your connection, introducing noise into the spectrum that disrupts your data flow.
    • Regularly update your firmware to patch vulnerabilities and optimize performance. In the same way we look for software updates to fix bugs in a new release, keeping your wireless hardware current ensures you’re utilizing the most efficient protocols available to maintain a stable environment.

    Mastering the Invisible Architecture

    Stop viewing wireless tech as magic; treat the RF spectrum like a complex game map where understanding signal congestion is the key to maintaining a high-performance connection.

    Approach Bluetooth selection with intention by matching the specific protocol to your hardware’s needs, ensuring you aren’t just connecting devices, but optimizing their synergy.

    True mastery comes from moving past mindless connectivity and starting to command your digital environment through a deliberate understanding of how these invisible systems interact.

    ## Beyond the Invisible Tether

    “We shouldn’t view wireless technology as just a convenience that removes the clutter from our desks; we should see it as a sophisticated layer of interaction. When you stop treating connectivity as magic and start understanding the invisible architecture of the signals around you, you move from being a passive user to a master of your own digital environment.”

    Delia Okonkwo

    Mastering the Invisible Grid

    Mastering the Invisible Grid of wireless technology.

    We’ve traveled from the broad, chaotic landscape of the radio frequency spectrum down to the specific, intentional handshake of Bluetooth protocols. Understanding these layers isn’t just about technical literacy; it’s about recognizing that wireless technology is a massive, interconnected skill tree. When you stop viewing a dropped signal or a latency spike as a mere annoyance and start seeing it as a symptom of how data is navigating the environment, you move from being a passive user to an informed operator. By grasping how these invisible waves compete and cooperate, you gain the ability to optimize your own digital ecosystem rather than just being at the mercy of it.

    Ultimately, whether you are syncing a controller for a high-stakes raid or managing a complex smart-home network, the goal remains the same: intentionality. We shouldn’t just let technology happen to us; we should aim to command it. Just as I spent hours learning the precise timing of a frame-perfect jump on an old arcade cabinet, I believe there is a profound satisfaction in mastering the tools that connect us. Don’t just consume the connectivity—learn the mechanics behind the magic and find the joy in a system that works exactly the way you intended it to.

    Frequently Asked Questions

    How do I balance the need for high-speed connectivity with the potential signal interference in a crowded, multi-device environment?

    Think of your signal environment like a crowded boss room; if everyone is casting spells at once, the chaos becomes unmanageable. To maintain high-speed flow, you have to prioritize your “loadout.” I suggest moving mission-critical devices—like your primary gaming rig or workstation—to the 5GHz or 6GHz bands to escape the 2.4GHz noise. It’s about intentional bandwidth allocation: reserve the cleanest channels for your high-stakes tasks and let the low-priority gadgets handle the interference.

    Is there a way to optimize my home wireless setup to minimize latency, similar to how one would fine-tune a game engine for better performance?

    Think of your home network like a game engine: if the background processes are hogging resources, your frame rate—or in this case, your ping—will tank. To minimize latency, stop relying on the default settings. Hardwire your most critical devices via Ethernet to bypass the “noise” of the airwaves, and switch to a less congested 5GHz or 6GHz band. It’s about reducing interference to ensure your data packets have a clear, unobstructed path.

    Beyond just convenience, what are the long-term implications of relying entirely on wireless protocols for our most essential data systems?

    When we trade physical connections for pure wireless reliance, we aren’t just gaining convenience; we’re increasing our systemic vulnerability. In my view, it’s like playing a high-stakes raid without a backup save point. We risk signal congestion and security breaches that could destabilize our most critical data flows. If we don’t approach this transition with intention—balancing wireless agility with the stability of wired foundations—we might find ourselves struggling to maintain control over the very systems we’ve mastered.

  • Integrating Smart Technology Into Your Gaming Room

    Integrating Smart Technology Into Your Gaming Room

    I remember sitting in my dim living room a decade ago, surrounded by a tangle of power strips and a flickering CRT monitor, trying to coax a decent frame rate out of a dying console. Back then, the goal was just survival. Today, the market tries to sell you the dream of a “smart” sanctuary, but most of the advice surrounding an iot gaming setup is just expensive noise designed to clutter your desk and your bank account. People act like you need a synchronized light show and a voice-activated coffee maker just to achieve peak performance, when in reality, most of these gadgets are just shiny distractions that break your cognitive flow.

    I’m not here to help you build a showroom; I’m here to help you build a functional ecosystem. My approach is grounded in how these systems actually interact with your focus and your biology. Over the next few sections, I will share my no-nonsense framework for selecting tech that actually serves your play, rather than just demanding your attention. We are going to focus on intentional integration—using smart technology to sharpen your environment and deepen your mastery of the game, without the unnecessary hype.

    Table of Contents

    Building a Seamless Iot Ecosystem for Gaming

    Building a Seamless Iot Ecosystem for Gaming.

    When I sit down to tackle a complex strategy game or a high-stakes boss fight, I’m not just looking for a distraction; I’m looking for immersion. This is where a well-planned iot ecosystem for gaming becomes a tool rather than a gimmick. It starts with the lighting. Instead of static LEDs that just sit there, I look for systems that allow for syncing lights with gameplay. When the hue of your room shifts from a calm blue to a frantic, pulsing red in response to an in-game event, your brain receives an immediate, visceral cue. This isn’t just about aesthetics; it’s about narrowing your sensory focus and pulling you deeper into the system.

    Beyond the visuals, the real mastery lies in how your hardware communicates. I’ve found that true efficiency comes from smart home integration for gamers, where your environment responds to your needs without you ever breaking your concentration. Imagine a setup where your smart blinds close automatically when you trigger your “gaming mode,” or where your temperature control adjusts as your session intensifies. By automating these peripheral variables, you eliminate the friction between your physical space and your digital world, allowing you to maintain a state of pure, uninterrupted flow.

    Mastering Smart Home Integration for Gamers

    Mastering Smart Home Integration for Gamers.

    Once you have the hardware established, the real magic happens when you stop treating your devices as isolated islands and start treating them as a single, responsive organism. True smart home integration for gamers isn’t about having a dozen different apps on your phone; it’s about reducing the cognitive load required to transition from “life mode” to “play mode.” I’ve found that when I can trigger a single command to dim the overheads and engage my peripherals, I enter a state of flow much faster. It removes those tiny, friction-filled micro-tasks that often break our concentration before a session even truly begins.

    The goal here is to create an automated gaming environment that anticipates your needs. Think about the psychological impact of syncing lights with gameplay; when your ambient lighting shifts to match the intensity of a boss fight or the calm of a simulation, your brain receives immediate, non-verbal cues that reinforce immersion. It’s not just about aesthetics—it’s about using your physical space to anchor your mental focus, turning your room into a tool that works alongside your skills rather than against them.

    Precision Tuning: 5 Ways to Optimize Your Digital Environment

    • Prioritize wired stability over wireless convenience. While the “magic” of IoT is wireless connectivity, your core gaming peripherals and high-bandwidth devices should remain on a stable, wired backbone to prevent the latency spikes that shatter your flow state.
    • Automate your environmental transitions. Use smart lighting to create “scene” triggers; for instance, a single command should dim the room, adjust your smart blinds, and shift your LED strips to a cool blue to signal to your brain that it is time to focus.
    • Monitor your ergonomics through smart tech. Integrate smart sensors into your desk or chair to track your posture and remind you to move; a gaming session is only as productive as your physical ability to sustain it.
    • Curate your sensory input. Don’t just blast sound; use smart audio ecosystems that allow for granular control over ambient noise versus game audio, ensuring that your auditory focus remains sharp and undistracted.
    • Build for redundancy, not just flash. A truly intelligent setup isn’t one that looks like a sci-fi movie, but one where your smart devices work in the background to minimize friction, leaving you with more mental bandwidth to master the game itself.

    Mastering Your Digital Environment

    View your IoT integration not as a collection of gadgets, but as a single, cohesive ecosystem designed to protect your cognitive focus and facilitate deep play.

    Prioritize automation that reduces friction, such as lighting shifts that signal the transition from work to play, helping your brain enter a state of flow more efficiently.

    Avoid the trap of mindless tech accumulation; every smart device added to your setup should serve a specific purpose in enhancing your mastery or your comfort during a session.

    Beyond the Gadgets

    An IoT setup shouldn’t just be a collection of blinking lights and expensive hardware; it should be a deliberate extension of your cognitive space, designed to minimize friction and maximize your ability to enter a state of true flow.

    Delia Okonkwo

    Curating Your Command Center

    Curating Your Command Center with IoT gadgets.

    Setting up an IoT gaming environment isn’t about collecting every smart gadget on the market to look high-tech; it’s about intentionality. We’ve looked at how a synchronized ecosystem of lighting, climate control, and responsive peripherals can strip away the external friction that pulls you out of the zone. When your smart lights dim automatically as your console boots up, or your room temperature adjusts to keep you from overheating during a high-stakes raid, you aren’t just playing—you are optimizing your cognitive load. By automating the mundane aspects of your physical surroundings, you free your mind to focus entirely on the complex systems within the game itself.

    As you begin to wire your space, remember that technology should always serve the player, never the other way around. Don’t get lost in the pursuit of a “perfect” setup that requires constant troubleshooting; the goal is to create a space that facilitates deep, uninterrupted flow. Whether you are restoring a vintage handheld or building a cutting-edge smart rig, the ultimate objective remains the same: to enhance the connection between your intent and your actions. Play with purpose, build with precision, and let your environment become the silent partner in your mastery.

    Frequently Asked Questions

    How do I prevent smart device latency from interfering with my reaction times during competitive play?

    Latency is the silent killer of flow state. If your smart lights or sensors are fighting for bandwidth on the same frequency as your peripherals, you’re playing at a disadvantage. My rule of thumb: isolate your gaming traffic. Use a dedicated VLAN for your IoT devices or, better yet, hardwire as much as possible via Ethernet. You want your competitive network to be a closed loop, ensuring your reaction times remain dictated by skill, not signal lag.

    Is it worth investing in a full ecosystem of connected lights and sensors, or should I focus on just the core hardware first?

    Look, I get the temptation to go all-in on the “smart room” dream, but don’t let the shiny lights distract you from the foundation. If your frame rates are dropping or your latency is spiking, a dozen Hue bulbs won’t save your experience. Focus on your core hardware—the PC, the console, the peripherals—first. Once your engine is running smoothly, then start layering in the sensors and lighting to tune your environment. Build the skill before the spectacle.

    How can I ensure my IoT setup remains secure so my gaming network doesn't become a vulnerability for my home data?

    Securing your setup isn’t about paranoia; it’s about protecting the sanctuary you’ve built. First, segment your network. Use your router to create a dedicated VLAN for your IoT devices, keeping them physically isolated from your primary PC and sensitive data. Next, treat every smart bulb and sensor like a potential entry point: change default credentials immediately and disable UPnP. We play to master systems, and that includes the architecture that keeps your digital life private.

  • Choosing a Reliable Power Supply Unit

    Choosing a Reliable Power Supply Unit

    I still remember the smell of ozone and scorched solder from my first real mistake: trying to revive a vintage handheld with a cheap, unbranded adapter I’d scavenged from a bargain bin. I thought I was being thrifty, but I was actually just gambling with my hardware. Most people treat power supplies like an afterthought, something you just grab based on the lowest price tag or a flashy RGB light strip, but that mindset is exactly how you end up killing an expensive GPU. It’s not just about wattage; it’s about the integrity of the current being fed into your system.

    I’m not here to sell you on the latest overpriced boutique brand or feed you a list of marketing buzzwords that mean nothing when your rig is under heavy load. Instead, I want to help you approach your build with the same intentionality we bring to mastering a difficult boss fight. I’m going to break down what actually matters—stability, efficiency, and long-term reliability—so you can stop guessing and start building with confidence. Let’s treat your hardware with the respect it deserves.

    Table of Contents

    Decoding 80 Plus Certification Levels for Maximum Efficiency

    Decoding 80 Plus Certification Levels for Maximum Efficiency

    When you start digging into the technical specs, you’ll inevitably run into the 80 Plus hierarchy. It’s easy to view these ratings as mere marketing fluff, but from a psychological standpoint, they represent a promise of stability. The different 80 plus certification levels—ranging from Bronze up to Titanium—essentially tell you how much electricity is being wasted as heat versus how much is actually powering your components. If you’re building a high-end rig for long, intensive sessions, aiming for Gold or higher isn’t just about saving a few pennies on your utility bill; it’s about ensuring your system operates with maximum thermal efficiency.

    I often tell my clients to look past the shiny sticker and consider what’s happening under the hood. A higher certification usually implies better internal architecture, specifically regarding how the unit handles capacitors and voltage ripple. High ripple can lead to inconsistent power delivery, which is the silent killer of expensive GPUs. Think of it like a steady heartbeat for your machine; you want that flow to be as smooth and intentional as possible to ensure your hardware’s longevity.

    Navigating Pc Building Components With Precision and Intent

    When you start gathering your PC building components, it’s easy to get swept up in the dopamine hit of picking out a flashy GPU or a high-speed processor. But if we treat a build like a well-designed game mechanic, we have to look at the underlying systems that keep everything running smoothly. Choosing a unit isn’t just about checking a box; it’s about intentionality. If you don’t plan for the spikes in power demand, you’re essentially playing a high-stakes boss fight without any health potions.

    I always suggest running your parts through a power supply unit wattage calculator before you commit to a purchase. It’s much better to over-spec slightly than to live in constant fear of a system crash during a critical moment. While you’re at it, consider the cable management aspect. Deciding between non-modular vs semi-modular PSU options can make the difference between a clean, efficient airflow path and a cluttered mess of wires that traps heat. Think of it as optimizing your workspace: a little bit of upfront organization prevents a lot of mid-game frustration later.

    The Five Pillars of a Stable Build: Essential PSU Tactics

    • Don’t play it close to the edge with wattage. I’ve seen too many builds struggle because the user calculated for the bare minimum; always leave yourself a 20% buffer to account for transient spikes and future upgrades.
    • Prioritize the modular approach. A fully modular PSU isn’t just about aesthetics; it’s about intentional cable management that improves airflow, keeping your system cool and your internal environment organized.
    • Check the rail distribution. It’s easy to get distracted by a flashy brand name, but you need to look at the +12V rail specifically—that’s where your heavy lifting happens, and it needs to be rock solid.
    • Respect the warranty as a proxy for quality. In my experience, a manufacturer willing to back a unit with a 7 to 10-year warranty is signaling that their internal components are built for longevity, not just quick profit.
    • Avoid the “bargain bin” trap. A cheap, unrated power supply is a single point of failure that can take your entire, carefully curated system down with it; treat your PSU as the foundation, not an afterthought.

    Mastering the Core: Final Thoughts on Your Power Strategy

    Treat your power supply as the heartbeat of your system, not an afterthought; a stable, high-quality unit ensures your hardware performs with the consistency required for high-stakes gaming.

    Don’t get lost in the marketing noise of certification levels; choose an efficiency rating that aligns with your actual usage and long-term goals for your build.

    Approach your component selection with intention, ensuring your PSU provides enough headroom to handle future upgrades without compromising the stability of your current setup.

    The Silent Foundation

    We often obsess over the flashy GPU or the lightning-fast CPU, but a power supply isn’t just a box of wires; it’s the steady heartbeat of your entire system. If you don’t treat your power delivery with intention, you’re essentially building a high-level character on a foundation of sand.

    Delia Okonkwo

    Finalizing Your Build: The Foundation of Stability

    Finalizing Your Build: The Foundation of Stability

    At the end of the day, choosing a power supply isn’t just about checking a box on a parts list; it’s about understanding the ecosystem you are building. We’ve looked at how 80 Plus certifications dictate efficiency and how to approach component selection with the same precision you’d use to master a complex boss fight. If you ignore the quality of your PSU, you aren’t just risking a crash; you are risking the long-term health of every single component in your rig. Treat your power delivery as the unseen backbone of your machine, ensuring it provides the stable, intentional energy required to sustain high-performance gameplay without compromise.

    As I sit here with my tea, watching the glow of my monitors, I’m reminded that the best setups are built on intention, not impulse. Whether you are building a high-end workstation or a budget-friendly gaming rig, remember that every choice you make is a step toward a more seamless experience. Don’t just play to pass the time; build a system that respects the games you love. Mastery starts long before you hit the start button—it begins with the foundation you lay and the deliberate decisions you make during the build. Happy gaming, and build with purpose.

    Frequently Asked Questions

    Is it actually worth paying the premium for a high-efficiency unit, or am I just chasing a spec sheet?

    It’s a fair question, and honestly, it’s easy to get lost in the numbers. If you’re just running a budget build for casual tasks, you aren’t going to see a massive difference in your electric bill. But for those of us running high-performance rigs, efficiency is about more than just cents; it’s about heat management and stability. A high-efficiency unit runs cooler and more reliably, protecting your investment like a well-optimized game engine.

    How much "headroom" do I really need to leave in my wattage calculations to ensure my system stays stable during heavy loads?

    Think of headroom like a buffer in a high-stakes boss fight; you don’t want to be redlining your health bar when things get intense. I generally recommend aiming for a 20% to 30% margin above your calculated peak draw. This isn’t just about preventing crashes during heavy loads; it’s about efficiency and longevity. Running a PSU near its limit generates unnecessary heat, whereas a little extra breathing room keeps your system stable and your components cool.

    Can a low-quality power supply actually damage my more expensive components, or is that just an old-school urban legend?

    It’s definitely not an urban legend. Think of your power supply as the heart of your system; if it skips a beat or sends an irregular pulse, the rest of the body suffers. A cheap, low-quality unit often lacks the sophisticated voltage regulation needed to handle spikes. When that protection fails, it doesn’t just shut down—it can send a surge straight into your GPU or motherboard, turning a small budget saving into a very expensive mistake.

  • Selecting a Pc Case With Optimal Airflow

    Selecting a Pc Case With Optimal Airflow

    I remember sitting on my bedroom floor in the late 90s, surrounded by a chaotic tangle of wires and a heavy, beige tower that felt more like a space heater than a machine. Back then, we didn’t care about aesthetics; we just wanted our hardware to survive the night. Fast forward to today, and I see people dropping hundreds of dollars on flashy, over-engineered cases for gaming that prioritize neon light shows over actual thermal efficiency. It frustrates me to see players chasing a specific “look” while completely ignoring the mechanical integrity and airflow required to keep their systems running at peak performance.

    I’m not here to sell you on the latest RGB trend or convince you that a more expensive chassis will magically improve your K/D ratio. Instead, I want to help you approach your setup with intention. I’ll be breaking down how to select a chassis that respects your components and supports a stable, long-term environment for your playstyle. We are going to look past the marketing hype and focus on the engineering that actually matters, so you can spend less time worrying about overheating and more time mastering the games you love.

    Table of Contents

    High Airflow Chassis Design Prioritizing Pc Case Thermal Performance

    High Airflow Chassis Design Prioritizing Pc Case Thermal Performance

    When we talk about high airflow chassis design, we aren’t just discussing aesthetic mesh panels; we are talking about the fundamental physics of your machine. If you’ve ever felt the frustration of a frame rate drop during a critical boss fight, you’ve likely experienced thermal throttling firsthand. A case that lacks proper ventilation forces your components to work harder just to stay cool, which eventually degrades their longevity. To maintain peak pc case thermal performance, you need a layout that treats air as a precious resource, moving it through the system with minimal resistance.

    I often find myself analyzing the trade-offs between different form factors, specifically the mid tower vs full tower debate. While a larger tower offers more breathing room and easier liquid cooling support, a well-engineered mid tower can provide exceptional thermal management without swallowing your entire desk. The goal is to find a balance where the airflow patterns are intentional, ensuring that heat is swept away from your GPU and CPU before it can pool in stagnant corners. It’s about creating an environment where your hardware can perform at its absolute limit, uninterrupted.

    Mid Tower vs Full Tower Selecting Your Ideal Playing Field

    Mid Tower vs Full Tower Selecting Your Ideal Playing Field

    When deciding between a mid tower vs full tower, I find it helpful to stop thinking about “size” and start thinking about spatial intention. A mid tower is often the sweet spot for most of us; it offers a compact footprint that doesn’t swallow your entire desk, yet it provides enough breathing room for standard components. If you aren’t planning on running a massive array of drives or a custom loop, a mid tower keeps your setup focused and efficient. It’s about choosing a chassis that matches the scale of your actual needs rather than just buying space for the sake of it.

    On the other hand, the full tower is a different beast entirely—it’s a dedicated workstation for the enthusiast. If your goal is to push your hardware to its absolute limits with extensive liquid cooling support or multiple high-end GPUs, the extra volume becomes a necessity. More importantly, the sheer internal real estate offers superior cable management solutions, allowing you to tuck away the clutter that often disrupts a clean aesthetic. For me, the choice comes down to whether you want a streamlined, agile setup or a sprawling, high-capacity command center.

    Beyond the Aesthetics: Five Tactical Considerations for Your Next Build

    • Prioritize cable management paths that actually make sense. A clean interior isn’t just about looking good for a photo; it’s about removing physical obstructions to airflow and making future component upgrades less of a headache.
    • Don’t overlook the importance of dust filtration. If you’re serious about the longevity of your hardware, choose a case with easily accessible, washable filters. It’s much easier to clean a mesh panel than it is to deep-clean a heat sink.
    • Evaluate your I/O placement based on your actual habits. If you frequently plug in peripherals or external drives while playing, ensure the front-panel ports are positioned where they won’t be constantly strained or blocked by your desk setup.
    • Check the clearance for your specific GPU and CPU cooler. It’s easy to get caught up in the specs of a chassis, but nothing kills the momentum of a build like realizing your high-performance components are physically too large for the “ideal” case.
    • Consider the acoustic properties of the materials. If you prefer a focused, immersive environment, look for cases with sound-dampening foam or thick panels that prevent your fans from turning your gaming space into a high-decibel wind tunnel.

    Final Thoughts: Investing in Your Setup

    Don’t view a case as a mere box for parts; treat it as the foundation of your system’s longevity and thermal stability.

    Choose a form factor that balances your physical workspace with the actual complexity and upgrade path of your hardware.

    Prioritize airflow and build quality over aesthetics alone to ensure your components can perform under the pressure of intense sessions.

    The Foundation of the System

    A gaming case isn’t just a box to hold your components; it is the environment that dictates how long your hardware can perform at its peak. If you don’t respect the thermal physics of your setup, you aren’t just risking a slowdown—you’re compromising the very tools you need to master the game.

    Delia Okonkwo

    Choosing Your Foundation

    Choosing Your Foundation: Selecting a PC case.

    Selecting a case isn’t just about picking a pretty box to sit under your desk; it is about establishing the physical foundation for your entire digital experience. We have looked at how thermal management through high-airflow designs prevents performance throttling, and how the scale of your chassis—whether it is a nimble mid-tower or a sprawling full-tower—dictates your long-term upgrade path. When you balance these technical requirements with your specific hardware needs, you aren’t just buying a component; you are investing in the longevity of your machine. A well-chosen case ensures that your components can breathe, perform, and endure the intense sessions that make gaming so rewarding.

    At the end of the day, your setup should reflect the way you approach the games you love. Whether you are a minimalist seeking efficiency or a builder crafting a masterpiece, remember that every piece of gear is a tool meant to facilitate your mastery. Don’t settle for a setup that merely functions; aim for one that respects the complexity of your passion. As you move from the selection process to the actual build, do so with intention. The right environment won’t just keep your hardware cool—it will provide the stability you need to focus entirely on the systems, the challenges, and the pure joy of the game.

    Frequently Asked Questions

    How much does the physical layout of a case actually impact my ability to manage cables and maintain a clean, functional workspace?

    It’s more significant than most people realize. A case isn’t just a box; it’s the infrastructure of your system. If the layout lacks dedicated routing channels or sufficient space behind the motherboard tray, you aren’t just dealing with a “messy” look—you’re fighting against airflow obstructions and thermal inefficiency. A well-engineered layout turns cable management from a frustrating chore into a streamlined process, allowing you to focus on the game rather than the clutter.

    Is it worth investing in a premium case for aesthetics, or should I prioritize raw thermal efficiency every single time?

    It’s a classic tug-of-war between form and function. If you’re chasing peak performance, thermal efficiency is your baseline; a stifled system is a wasted investment. However, I don’t view aesthetics as mere vanity. Your setup is the environment where you spend your most focused hours. If a premium, beautiful case inspires you to sit down and engage with your hobby, that psychological value is real. Aim for a balance: find a chassis that respects your hardware’s needs while actually looking like something you’re proud to own.

    When upgrading an older build, how do I ensure my current components will actually fit into a modern chassis without running into compatibility headaches?

    Compatibility is where many intentional builds stumble. Before you commit, don’t just trust the “compatible” badge; verify the specifics. Check your motherboard’s form factor against the case’s mounting points, and measure your GPU length against the internal clearance. Most importantly, check the CPU cooler height and PSU depth. I’ve seen too many beautiful upgrades sidelined because a massive modern card hit a front radiator. Measure twice, buy once.

  • Improving Your Gaming Audio Quality

    Improving Your Gaming Audio Quality

    I remember sitting in my cramped home office years ago, surrounded by half-disassembled Game Boys and a lukewarm cup of Earl Grey, staring at a screen full of distorted, crackling audio. I had spent a small fortune on gear, thinking that a higher price tag automatically translated to better fidelity, only to realize I had just bought into a massive marketing myth. The truth is, most people treat audio interfaces like they’re buying a high-end gaming rig—expecting more money to equal more skill—when in reality, the hardware is just a bridge. If you don’t understand the signal path, you aren’t mastering your sound; you’re just adding expensive noise to the equation.

    I’m not here to sell you on the latest shiny toy or the “industry standard” that’s really just a brand name. My goal is to strip away the technical jargon and the predatory marketing so you can focus on what actually matters: your intent. I’m going to walk you through how to choose audio interfaces that actually serve your specific workflow, focusing on clarity and reliability rather than hype. Let’s stop mindless consuming and start building a setup that actually helps you play, create, and master your craft.

    Table of Contents

    Navigating Analog to Digital Conversion With Precision

    When we talk about capturing sound, we aren’t just talking about moving electricity from a mic to a computer; we are talking about the delicate art of analog to digital conversion. In my experience, this is where the soul of a performance can either be preserved or lost in translation. If the converter is subpar, you end up with a signal that feels thin or “brittle,” much like trying to play a high-fidelity soundtrack through a low-end arcade speaker. You want a conversion process that respects the nuance of the original source, ensuring that every transient and subtle decay is translated into data without losing its character.

    This precision is heavily dependent on your hardware’s internal architecture. A high-end usb audio interface for recording won’t just offer more inputs; it provides the stability needed to minimize latency in digital audio, allowing you to monitor your performance in real-time without that disorienting delay. When you’re deep in a session, even a few milliseconds of lag can break your cognitive flow and ruin your timing. Mastering your signal path means choosing components that act as a transparent bridge, rather than a bottleneck, between your creative intent and the final digital file.

    Achieving Sonic Clarity Through Superior Preamp Quality Comparison

    Achieving Sonic Clarity Through Superior Preamp Quality Comparison

    When you’re deep in a session, trying to capture that perfect, nuanced performance, the preamps are where the real magic—or the real frustration—happens. I often think about this in terms of game mechanics; if the input is flawed, no amount of post-processing will save the experience. A preamp quality comparison isn’t just about technical specs on a spreadsheet; it’s about how much “color” or “cleanliness” the hardware injects into your signal. Some units offer a transparent, surgical precision that feels almost invisible, while others add a warmth that mimics the soul of vintage gear.

    If you’re building a professional studio setup, you need to ensure your preamps can handle your specific gear without struggle. This is particularly vital when considering phantom power requirements for condenser microphones. If the power delivery is inconsistent, you’ll encounter noise floors that act like constant, annoying static in a high-stakes boss fight. You want a tool that respects the integrity of your source, allowing you to focus on the artistry of the sound rather than fighting against technical limitations.

    Beyond the Specs: Five Ways to Approach Your Interface with Intention

    • Don’t get blinded by the spec sheet; prioritize the latency that matches your workflow. If you’re tracking live instruments, a low-latency driver is more important than having twenty extra inputs you’ll never actually use.
    • Match your converters to your ears, not your ego. It’s tempting to chase the highest bit depth, but focus instead on how the interface handles the transients of your specific sound—that’s where the real musicality lives.
    • Treat your gain staging like a discipline. A high-quality preamp is useless if you’re clipping the input or leaving too much to chance; learn the sweet spot of your hardware so you can play with confidence rather than constantly adjusting levels.
    • Invest in the connection, not just the box. A mediocre USB or Thunderbolt cable can introduce more jitter and frustration than a mediocre interface ever would. Treat your signal path as a single, unbroken system.
    • Think about your future self when choosing connectivity. It is far more rewarding to buy an interface that can grow with your technical complexity than to realize six months in that you’ve outgrown your setup and have to start the learning curve all over again.

    Mastering Your Sound: Three Essentials for Intentional Recording

    Stop treating your interface as a mere bridge; view it as the foundation of your signal path where high-quality A/D conversion preserves the nuance of your performance.

    Prioritize preamp quality over flashy features, as clean gain is the difference between a professional recording and a session cluttered with unwanted noise.

    Match your gear to your specific creative goals rather than chasing specs, ensuring your tools serve your intention rather than complicating your process.

    ## The Interface as a Bridge, Not a Barrier

    “An audio interface shouldn’t just be a box that facilitates a connection; it should be a transparent conduit that respects the intention behind your sound, ensuring the nuance you feel in the moment isn’t lost in the translation to the digital realm.”

    Delia Okonkwo

    Beyond the Specs: Finding Your Sonic Signature

    Beyond the Specs: Finding Your Sonic Signature

    At the end of the day, choosing an audio interface isn’t just about checking boxes on a spec sheet. We’ve looked at how the precision of analog-to-digital conversion preserves the integrity of your performance and how high-quality preamps serve as the foundation for your entire signal chain. It’s easy to get lost in the technical jargon of bit depths and sample rates, but remember that these tools exist to serve a specific purpose: capturing your intent without compromise. Whether you are prioritizing a transparent signal or a specific colored warmth, the goal is to ensure that the bridge between your creativity and your computer remains as seamless and accurate as possible.

    As I sit here with my tea, watching the lights flicker on my desk, I’m reminded that the best gear is the gear that eventually disappears into the background. You shouldn’t be fighting your hardware; you should be mastering it. Don’t let the pursuit of the “perfect” interface become a distraction from the actual act of creation. Instead, choose a tool that allows you to play with intention and focus on the nuances of your sound. Once you stop worrying about the technical hurdles, you finally have the space to find the true joy in every note you record.

    Frequently Asked Questions

    How much does the latency of my interface actually impact my ability to play rhythm-based games or live instruments?

    If you’re playing rhythm games or tracking live instruments, latency isn’t just a technical spec—it’s the difference between flow and frustration. In rhythm-based gaming, even a few milliseconds of delay can desync your inputs from the visual cues, shattering your concentration. When playing an instrument, that lag creates a disorienting disconnect between your physical movement and the sound you hear. To play with true intention, you need an interface that minimizes that gap.

    At what point does upgrading my preamp quality move from a meaningful skill enhancement to just unnecessary consumerism?

    It’s a fine line, isn’t it? In my experience, the shift happens when you stop chasing “better” and start chasing “specific.” If you’re upgrading because you can hear a lack of headroom or a specific harmonic character that’s holding your performance back, that’s intentional growth. But if you’re just buying gear because a spec sheet looks impressive, you’re drifting into mindless consumption. Upgrade when the tool becomes a barrier to your intent.

    Is it worth investing in a high-end interface now, or should I focus on mastering my current setup before scaling up?

    Don’t fall into the trap of thinking a shiny new interface will magically fix a lack of technique. I see this often: players chasing better gear to compensate for a shallow understanding of their current tools. Master the signal chain you have right now. If you can’t produce intentional, clean results with your current setup, a high-end unit will only highlight your limitations. Learn the system first; scale up only when you’ve outgrown its capabilities.